
Set up your project
Setting up a organized project will help you remain productive as your project grows. The broad steps involved are:
Pick a name and create a folder for your project
Initialize a git repository and sync to Github
Set up a virtual environment
Create a project skeleton
Install a project package
The end result will be a logically organized project skeleton that’s synced to version control.
Warning
I will present most of the project setup in the terminal, but you can do many of these steps inside of an IDE or file explorer.
Pick a name and create a folder for your project
When you start a project, you will need to decide how to structure it. As an academic, a project will tend to naturally map to a paper. Therefore, one project = one paper = one folder = one git repository is a generally a good default structure.
Pick a short and descriptive name for your project and create a folder in your Documents folder. For instance, when I created the project for this book, the first step was to create the codebook folder:
~/Documents$ mkdir codebook
Initialize a git repository and sync to Github
Since git is such a core tool to manage code-heavy projects, I recommend that you set it up immediately. The way I prefer to do this is by going to Github and clicking the big green New button to create a new repository. I name the remote the same as my local folder and hit Create Repository.
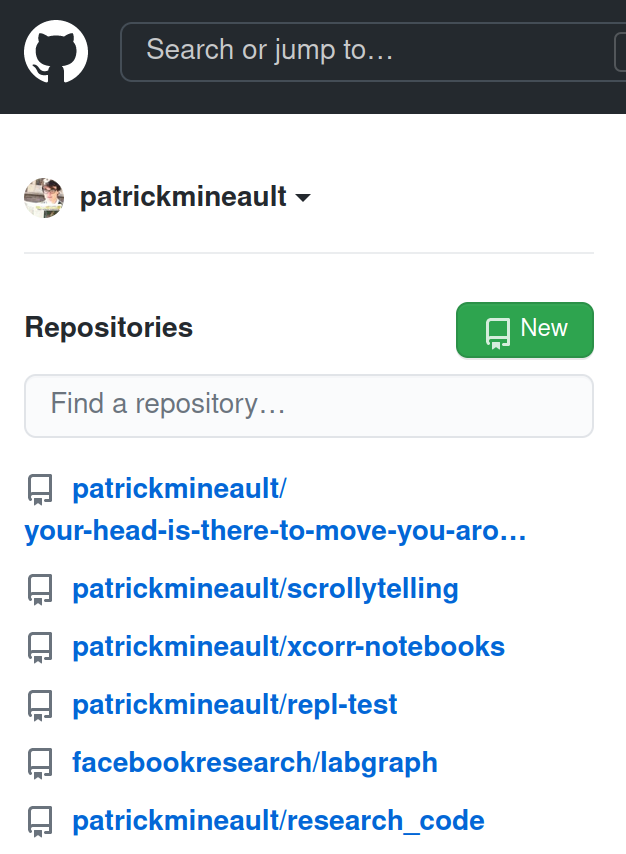
Fig. 4 The big green New button.
I then follow Github’s instructions to initialize the repo. In ~/Documents/codebook, I run:
echo "# codebook" >> README.md
git init
git add README.md
git commit -m "first commit"
git branch -M main
git remote add origin https://github.com/patrickmineault/codebook.git
git push -u origin main
How often do you think you should commit to git?
Spoilers
Depending on your pace, you should aim to commit your code from a few times a day to a few times per week. Don’t wait until the project is almost finished before you start to commit.
The general rule of thumb is that one commit should represent a unit of related work. For example, if you made changes in 3 files to add a new functionality, that should be one commit. Splitting the commit into 3 would lose the relationship between the changes; combining these changes with 100 other changed files would make it very hard to track down what changed. Try to make your git commit messages meaningful, as it will help you keep track down bugs several months down the line.
If you don’t use git very often, you might not like the idea of committing to git daily or multiple times per day. The git command line can feel like a formidable adversary; GUIs can ease you into it. I used to use the git command line exclusively. These days, I tend to prefer the git panel in VSCode.
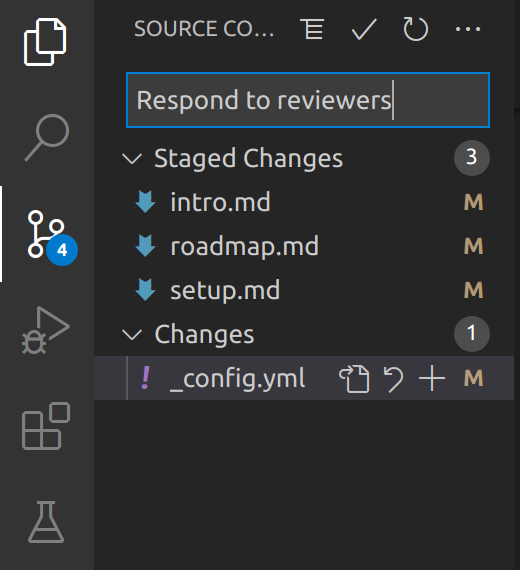
Fig. 5 The git panel in VSCode.
Set up a virtual environment
Why do I use virtual Python environments? So I don’t fuck up all my local shit.
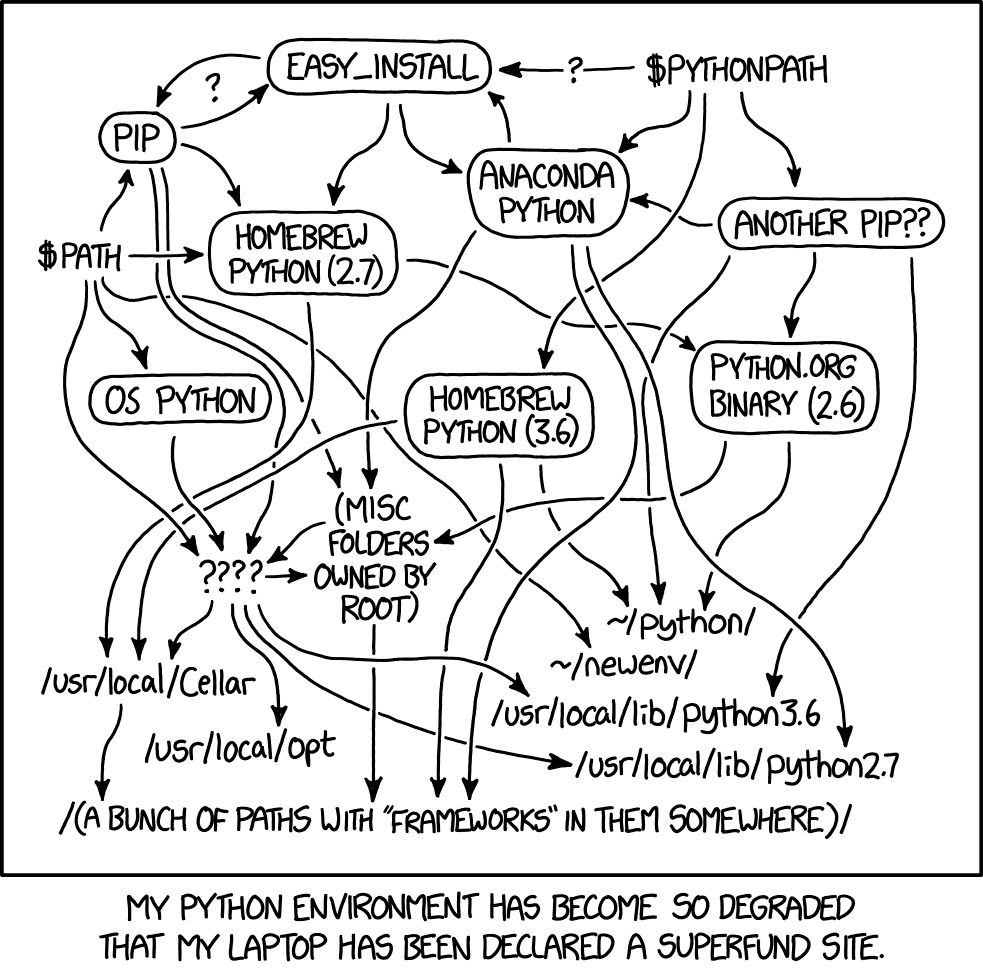
Many novices starting out in Python use one big monolithic Python environment. Every package is installed in that one environment. The problem is that this environment is not documented anywhere. Hence, if they need to move to another computer, or they need to recreate the environment from scratch several months later, they’re in for several hours or days of frustration.
The solution is to use a virtual environment to manage dependencies. Each virtual environment specifies which versions of software and packages a project uses. The specs can be different for different projects, and each virtual environment can be easily swapped, created, duplicated or destroyed. You can use software like conda, pipenv, poetry, venv, virtualenv, asdf or docker - among others - to manage dependencies. Which one you prefer is a matter of personal taste and countless internet feuds. Here I present the conda workflow, which is particularly popular among data scientists and researchers.
Conda
Conda is the de facto standard package manager for data science-centric Python. conda is both a package manager (something that installs package on your system) and a virtual environment manager (something that can swap out different combinations of packages and binaries - virtual environments - easily).
Once conda is installed - for instance, through miniconda - you can create a new environment and activate it like so:
~/Documents/codebook$ conda create --name codebook python=3.8
~/Documents/codebook$ conda activate codebook
From this point on, you can install packages through the conda installer like so:
(codebook) ~/Documents/codebook$ conda install pandas numpy scipy matplotlib seaborn
Now, you might ask yourself, can I use both pip and conda together?
Spoilers
You can use pip inside of a conda environment. A big point of confusion is how conda relates to pip. For conda:
Conda is both a package manager and a virtual environment manager
Conda can install big, complicated-to-install, non-Python software, like
gccNot all Python packages can be installed through conda
For pip:
pip is just a package manager
pip only installs Python packages
pip can install every package on PyPI in additional to local packages
conda tracks which packages are pip installed and will include a special section in environment.yml for pip packages. However, installing pip packages may negatively affect conda’s ability to install conda packages correctly after the first pip install. Therefore, people generally recommend installing big conda packages first, then installing small pip packages second.
Export your environment
To export a list of dependencies so you can easily recreate your environment, use the export env command:
(codebook) ~/Documents/codebook$ conda env export > environment.yml
You can then commit environment.yml to document this environment. You can recreate this environment - when you move to a different computer, for example - using:
$ conda env create --name recoveredenv --file environment.yml
This export method will create a well-documented, perfectly reproducible conda environment on your OS. However, it will document low-level, OS-specific packages, which means it won’t be portable to a different OS. If you need portability, you can instead write an environment.yml file manually. Here’s an example file:
name: cb
channels:
  - conda-forge
  - defaults
dependencies:
  - python=3.8
  - numpy=1.21.2
  - pip
  - pip:
    - tqdm==4.62.3
pip and conda packages are documented separately. Note that pip package versions use == to identify the package number, while conda packages use =. If you need to add dependencies to your project, change the environment.yml file, then run this command to update your conda environment:
(cb) $ conda env update --prefix ./env --file environment.yml --prune
You can read more about creating reproducible environments in this Carpentries tutorial. You can also use the environment.yml file for this book’s repo as an inspiration.
Create a project skeleton
In many different programming frameworks - Ruby on Rails, React, etc. - people use a highly consistent directory structure from project to project, which makes it seamless to jump back into an old project. In Python, things are much less standardized. I went into a deep rabbit hole looking at different directory structures suggested by different projects. Here’s a consensus structure you can use as inspiration:
|-- data
|-- docs
|-- results
|-- scripts
|-- src
|-- tests
 -- .gitignore
 -- environment.yml
 -- README.md
Let’s look at each of these components in turn.
Folders
data: Where you put raw data for your project. You usually won’t sync this to source control, unless you use very small, text-based datasets (< 10 MBs).docs: Where you put documentation, including Markdown and reStructuredText (reST). Calling itdocsmakes it easy to publish documentation online through Github pages.results: Where you put results, including checkpoints, hdf5 files, pickle files, as well as figures and tables. If these files are heavy, you won’t put these under source control.scripts: Where you put scripts - Python and bash alike - as well as .ipynb notebooks.src: Where you put reusable Python modules for your project. This is the kind of python code that youimport.tests: Where you put tests for your code. We’ll cover testing in a later lesson.
You can create this project structure manually using mkdir on the command line:
$ mkdir {data,docs,results,scripts,src,tests}
Files
.gitignorecontains a list of files that git should ignore.README.mdcontains a description of your project, including installation instructions. This file is what people see by default when they navigate to your project on GitHub.environment.ymlcontains the description of your conda environment.
.gitignore can be initialized to the following:
*.egg-info
data
A README.md should have already been created during the initial sync to Github. You can either create an environment.yml file manually or export an exhaustive list of the packages you are currently using:
$ conda env export > environment.yml
Install a project package
Warning
Creating a project package is slightly annoying, but the payoff is quite substantial: your project structure will be clean, you won’t need to change Python’s path, and your project will be pip installable.
You might notice a flaw in the preceding project structure. Let’s say you create a reusable lib.py under the src folder, with a function my_very_good_function. How would you reference that function in scripts/use_lib.py? This doesn’t work:
>>> from ..src.lib import my_very_good_function
Traceback (most recent call last):
  File "<stdin>", line 1, in <module>
ImportError: attempted relative import with no known parent package
You need to tell Python where to look for your library code. You have two options, change your Python path, or create an installable package. I recommend the installable package route, but cover the Python path route first because you’re likely to encounter it in other projects.
Change your Python path (not recommended)
You can put the src folder on your Python path. To do so, you can append the src folder to the system variable PYTHONPATH when bash starts up (in ~/.bashrc). You might alternatively dynamically append to the system path from Python, via:
import sys
sys.path.append('/home/me/Documents/codebook/src')

from src.lib import my_very_good_function
This pattern is also frequently used in jupyter notebooks - I often see it in code cells at the top of notebooks.
The disadvantage of changing the path is that it tends to be pretty brittle. You have to hard-code the name of folders in multiple places. If they move, you will break your package. It won’t work on another computer with different paths, so it will make it hard to share your project with colleagues. Furthermore, dynamic paths don’t play well with IDEs like vscode that can only look in the static environment, so you won’t get automatic code completion.
Create a pip-installable package (recommended)
This is a more scalable solution. The packaging ecosystem in Python can feel frankly daunting, but a lot of it we don’t need for our purposes. Creating a locally pip installable package actually only involves a few steps.
1. Create a setup.py file
Create a setup.py file in the root of your project. Here’s a minimal setup file:
from setuptools import find_packages, setup

setup(
    name='src',
    packages=find_packages(),
)
2. Create a __init__.py file
Create an empty __init__.py file under the src directory. This will allow the find_packages function to find the package.
(codebook) ~/Documents/codebook $ touch src/__init__.py
Your files should now look like:
|-- data
|-- doc
|-- results
|-- scripts
|-- src
|    -- __init__.py
|-- tests
 -- .gitignore
 -- environment.yml
 -- README.md
 -- setup.py
3. pip install your package
Now comes the fun part, installing the package. You can do so using:
(codebook) ~/Documents/codebook $ pip install -e .
. indicates that we’re installing the package in the current directory. -e indicates that the package should be editable. That means that if you change the files inside the src folder, you don’t need to re-install the package for your changes to be picked up by Python.
4. Use the package
Once the package is locally installed, it can be easily used regardless of which directory you’re in. For instance:
(codebook) ~/Documents/codebook $ echo "print('hello world')" > src/helloworld.py
(codebook) ~/Documents/codebook $ cd scripts
(codebook) ~/Documents/codebook/scripts $ python
>>> import src.helloworld
hello world
>>> exit()
(codebook) ~/Documents/codebook/scripts $ cd ~
(codebook) ~ $ python
>>> import src.helloworld
hello world
How does this work? When you install a package in editable mode, Python essentially adds your code to its path. That makes it available from anywhere. The path is changed in such a way that conda, vscode and other tools are aware that your package is installed, so all these tools will know where to find your code.
Note
To find out where the code for an installed package is located, print the module info in the Python console:
>>> import src
>>> src
<module 'src' from '/home/pmin/Documents/codebook/src/__init__.py'>
>>> import numpy as np
>>> np
<module 'numpy' from '/envs/cb/lib/python3.8/site-packages/numpy/__init__.py'>
5. (optional) Change the name of the package
Note that the name of the folder which contains the code, src, becomes the name of the package. If you’d like to rename the package, for example to cb, change the name of the folder:
(codebook) ~/Documents/codebook $ mv src cb
If Python doesn’t pick up your changes for whatever reason, re-install your package like so:
(codebook) ~/Documents/codebook $ pip install -e .
Use the true-neutral cookiecutter
If doing all this for every new project sounds like a lot of work, you can save yourself some time using the true neutral cookiecutter, which creates the project skeleton outlined above automatically. cookiecutter is a Python tool which generates project folders from templates. You can install it in the base conda environment with:
(base) ~/Documents $ pip install cookiecutter
To create the codebook folder with all its subfolders and setup.py, use the following:
(base) ~/Documents $ cookiecutter gh:patrickmineault/true-neutral-cookiecutter
This will create an instance of the true-neutral-cookiecutter project skeleton, which is hosted on my personal github. Follow the prompts and it will create the folder structure above, including the setup file. Next, pip install the package you’ve created for yourself, and sync to your own remote repository, following the github instructions.
Discussion
Using structured projects linked to git will help your long-term memory. You will be able to instantly understand how files are laid out months after you’ve last worked on that project. Using a virtual environment will allow you to recreate that environment in the far future. And git will give you a time machine to work with.
Writing for your future self has an added bonus: it can make it easier for other people to use your project. Consider this: everything at Google is in one giant repository with billions of lines of code. As a new software engineer, you’re invited to commit to that repository during your first week. Because everything is organized according to strict conventions, so it’s not as terrifying as it sounds to jump in. Structure is what enables sustainable growth.
5-minute exercise
Create an empty project with the true-neutral cookiecutter.